How to Build an X-Ray Lens Effect in Articulate Storyline with JavaScript
Learn how to build a JavaScript x-ray lens effect in Articulate Storyline using four slide objects and a single Execute JavaScript trigger. This step-by-step tutorial walks you through the DOM manipulation, CSS clipping, and drag logic that make it all work.
By Nathan Stoker · Published Oct 6, 2026 · 15 min read
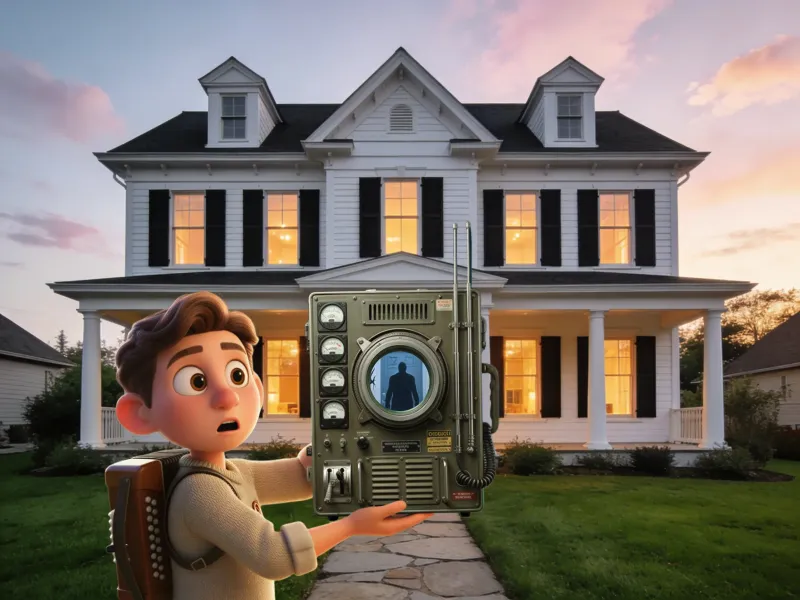
Ever wanted to give learners an interactive way to explore hidden layers of an image? Imagine a draggable magnifying glass that reveals an x-ray, blueprint, or annotation layer underneath a surface image. This kind of interaction grabs attention, drives curiosity, and makes content exploration feel like discovery rather than clicking "Next."
In this tutorial, you'll learn how to build a JavaScript x-ray lens effect in Articulate Storyline using four slide objects and a single Execute JavaScript trigger. No plugins, no external libraries, and it works beautifully on desktop and mobile.
What You'll Build
The x-ray lens effect uses four objects on your Storyline slide:
Surface Image: The visible top layer (the "normal" view).
Reveal Image: The hidden layer underneath (the x-ray, wireframe, or alternate view). This image is the same dimensions as the surface and sits directly behind it.
Lens Shape: The shape that acts as the viewport. This can be any shape Storyline supports: a circle, rectangle, star, freeform, or custom shape. The JavaScript reads the shape's SVG path data and clips the reveal image to match it exactly.
Lens Group: A group containing the lens shape and any decorative elements around it. This could be an x-ray machine graphic, a magnifying glass frame, a sci-fi scanner, or just a simple border ring. The entire group moves together when learners drag it.
The JavaScript handles everything: injecting the reveal image into the lens, keeping it aligned with the surface, dragging the group across the slide, and hiding the reveal image so it's never visible outside the lens.
Setting Up Your Storyline Slide
Before touching any code, you need to set up four objects on your slide.
Prepare Your Images
Create two images with identical dimensions. The surface is what learners see normally, and the reveal is what they'll discover through the lens. These images must be the exact same size and placed in the exact same position on the slide.
Good pairings include a photo with its x-ray version, a finished product with its blueprint, or a before-and-after comparison.
Add the Lens Shape
Insert any shape on your slide. This will become the draggable lens viewport. A circle works great for a classic magnifying glass, but you can use a rectangle, star, freeform shape, or anything else. The JavaScript will read the shape's SVG path and clip the reveal to match, so whatever shape you draw in Storyline is the shape learners will see the reveal through. Set the fill to fully transparent so learners see through it to the reveal layer.
Group the Lens
Here's a key step most tutorials miss. Group the lens shape with a visual element that gives it context. This could be an x-ray machine graphic, a magnifying glass frame, a sci-fi scanner overlay, or even just a styled border ring. The JavaScript moves the entire group when the learner drags, so the lens and its surrounding graphic stay together.
The group is what sells the interaction visually. A bare transparent circle works technically, but wrapping it in a themed graphic transforms it from "drag this circle" into "use this device."
Layer Order Matters
Your timeline stacking order from bottom to top should be:
Reveal Image (bottom)
Surface Image (middle)
Lens Group (top)
The reveal image sits behind the surface, completely hidden by it. The JavaScript will handle making it visible only through the lens.
Gather Your data-model-id Values
Every object in Storyline's published output gets a unique data-model-id attribute. You'll need four of these IDs for your JavaScript: the surface image, the reveal image, the lens shape, and the lens group. If you're new to JavaScript triggers in Storyline, the Articulate documentation on Execute JavaScript covers the basics of adding them.
These IDs are stable across publishes of the same project. They only change if you delete and recreate the object.
Understanding How the Code Works
Before diving into the full script, let's break down the core concepts.
Finding Elements in the DOM
Storyline renders each slide object as a <div> with a data-model-id attribute. The script locates elements using standard querySelector calls scoped to the slide's content area:
var slideArea = document.querySelector('[data-dv_ref="contentArea"]');
var surfaceEl = slideArea.querySelector('[data-model-id="YOUR_SURFACE_ID"]');
This pattern ensures the script only targets objects on the current slide, even if other slides share similar structures.
The Clipping Trick
The lens effect works by creating a <div> overlay inside the lens shape element with overflow: hidden. An <img> tag inside that overlay loads the reveal image source. The overlay clips to the lens shape, so only the portion of the reveal image that falls within the lens bounds is visible.
Rather than hardcoding a circle with border-radius, the script reads the actual SVG <path> data from the lens element. Storyline renders every shape as an SVG path, so whatever shape you drew in Storyline becomes the clip shape automatically. The script extracts the path's d attribute and applies it as a CSS clip-path:
// Read the SVG path from the lens shape
var lensSvg  = lensEl.querySelector('svg');
var lensPath = lensEl.querySelector('path');
var pathData = lensPath.getAttribute('d');
var vb       = lensSvg.getAttribute('viewBox').split(' ');
var vbW      = parseFloat(vb[2]);
var vbH      = parseFloat(vb[3]);

// Build the overlay, clipped to the lens shape
var overlay = document.createElement('div');
overlay.style.cssText =
    'position:absolute;top:0;left:0;width:100%;height:100%;' +
    'overflow:hidden;pointer-events:none;' +
    'clip-path:path("' + pathData + '");';
This means circles, rectangles, stars, freeforms, and any custom Storyline shape all work without changing a single line of code.
Position Alignment via Transform Parsing
Here's where it gets interesting. The reveal image inside the lens needs to align pixel-perfectly with the surface image below it. If the lens is sitting on top of the dragon's head, the x-ray inside the lens needs to show exactly the dragon's head, not some offset portion.
Storyline positions objects using CSS transforms, but it doesn't always use the same format. Some objects get transform: translate(x, y), while others (especially groups) use transform: matrix(a, b, c, d, tx, ty) where the 5th and 6th values are the translation. You'll often see both in the same transform chain. For example, a group element might have matrix(1, 0, 0, 1, 638, 94) translate(90px, 153px), combining both formats.
The script walks up the DOM tree from each element to the slide area, parsing both translate() and matrix() patterns and summing every translation value it finds:
function getAbsoluteTranslate(el) {
    var x = 0, y = 0;
    var current = el;
    while (current && current !== slideArea) {
        var t = current.style.transform || '';

        // Match translate(Xpx, Ypx)
        var tRegex = /translate\(([-\d.]+)px,\s*([-\d.]+)px\)/g;
        var m;
        while ((m = tRegex.exec(t)) !== null) {
            x += parseFloat(m[1]);
            y += parseFloat(m[2]);
        }

        // Match matrix(a, b, c, d, tx, ty)
        var mRegex = /matrix\(\s*([-\d.]+)\s*,\s*([-\d.]+)\s*,\s*([-\d.]+)\s*,\s*([-\d.]+)\s*,\s*([-\d.]+)\s*,\s*([-\d.]+)\s*\)/g;
        while ((m = mRegex.exec(t)) !== null) {
            x += parseFloat(m[5]);
            y += parseFloat(m[6]);
        }

        current = current.parentElement;
    }
    return { x: x, y: y };
}
This gives the absolute position of each element relative to the slide, regardless of how deeply nested or grouped it is and regardless of which transform format Storyline uses. The difference between the surface position and the lens position becomes the initial offset for the reveal image.
Drag and Keyboard Implementation
The drag system uses the Pointer Events API, which handles mouse, touch, and pen input in a single set of events. This means the interaction works on desktop, tablets, and phones without any extra code. The script captures the group element's original CSS transform, then appends an additional translate() on each drag move.
For keyboard accessibility, the group element receives tabindex="0" and role="application" so it can be focused via Tab. Arrow keys move the lens 10 pixels per press, sharing the same position update logic as pointer drag. An aria-live region announces discoveries to screen readers.
Critically, the reveal image offset shifts in the opposite direction of the drag. When you drag the lens 100 pixels to the right, the reveal image inside moves 100 pixels to the left. This keeps the reveal image anchored to the surface, so the visible portion through the lens always matches the surface content directly below.
Complete JavaScript X-Ray Lens Effect Code
Place this in an Execute JavaScript trigger. The recommended trigger setup is:
When: Timeline starts
Action: Execute JavaScript
Set the trigger at a slight offset on the timeline (around 0.25 seconds) to ensure all objects have rendered. You can also fade in the lens group to mask any brief initialization.
Replace the four ID variables at the top with your own data-model-id values.
(function () {

    // ─────────────────────────────
    // CONFIGURATION — Replace these with your own data-model-id values
    // ─────────────────────────────
    var SURFACE_OBJ = '5j7AGws53dU';  // The visible top image
    var REVEAL_OBJ  = '5WndEb2goOS';  // The hidden image (x-ray, blueprint, etc.)
    var LENS_OBJ    = '6kN6kx8IejA';  // The lens shape (any Storyline shape)
    var GROUP_OBJ   = '6oLfgDHlNoC';  // The group containing the lens

    // ─────────────────────────────
    // Hide reveal ASAP — observer + style tag combo
    // Prevents flash of the reveal image before JS initializes
    // ─────────────────────────────

    var style = document.createElement('style');
    style.textContent = '[data-model-id="' + REVEAL_OBJ + '"] { visibility: hidden !important; }';
    document.head.appendChild(style);

    var revealHidden = false;
    var observer = new MutationObserver(function () {
        if (revealHidden) return;
        var el = document.querySelector('[data-model-id="' + REVEAL_OBJ + '"]');
        if (el) {
            el.style.visibility = 'hidden';
            revealHidden = true;
        }
    });
    observer.observe(document.body, { childList: true, subtree: true });

    // ─────────────────────────────
    // Main initialization
    // ─────────────────────────────

    function init() {
        var slideArea = document.querySelector('[data-dv_ref="contentArea"]');
        if (!slideArea) return false;

        var surfaceEl = slideArea.querySelector('[data-model-id="' + SURFACE_OBJ + '"]');
        var revealEl  = slideArea.querySelector('[data-model-id="' + REVEAL_OBJ + '"]');
        var lensEl    = slideArea.querySelector('[data-model-id="' + LENS_OBJ + '"]');
        var groupEl   = slideArea.querySelector('[data-model-id="' + GROUP_OBJ + '"]');

        if (!surfaceEl || !revealEl || !lensEl || !groupEl) return false;

        var revealImgTag = revealEl.querySelector('image');
        if (!revealImgTag) return false;

        // Stop observing once initialized
        observer.disconnect();

        // Get the reveal image source from the SVG <image> element
        var revealSrc =
            revealImgTag.getAttribute('href') ||
            revealImgTag.getAttribute('xlink:href');

        // ─────────────────────────────
        // Read the lens shape's SVG path for clipping
        // This makes ANY Storyline shape work as the lens
        // ─────────────────────────────

        var lensSvg  = lensEl.querySelector('svg');
        var lensPath = lensEl.querySelector('path');
        if (!lensSvg || !lensPath) return false;

        var pathData = lensPath.getAttribute('d');
        var vb       = lensSvg.getAttribute('viewBox').split(' ');
        var vbW      = parseFloat(vb[2]);
        var vbH      = parseFloat(vb[3]);

        // ─────────────────────────────
        // Build the overlay clipped to the lens shape
        // ─────────────────────────────

        var overlay = document.createElement('div');
        overlay.style.cssText =
            'position:absolute;top:0;left:0;' +
            'width:' + vbW + 'px;height:' + vbH + 'px;' +
            'overflow:hidden;pointer-events:none;' +
            'clip-path:path("' + pathData + '");';
        lensEl.appendChild(overlay);

        var lensImg = document.createElement('img');
        lensImg.src = revealSrc;
        lensImg.style.cssText = 'position:absolute;pointer-events:none;';
        overlay.appendChild(lensImg);

        // ─────────────────────────────
        // Size the reveal to match the surface
        // Uses offsetWidth/Height to avoid clipping issues
        // ─────────────────────────────

        var surfaceW = surfaceEl.offsetWidth;
        var surfaceH = surfaceEl.offsetHeight;

        lensImg.style.width  = surfaceW + 'px';
        lensImg.style.height = surfaceH + 'px';

        // ─────────────────────────────
        // Calculate position offset
        // Walks up DOM tree to sum ALL translation sources:
        // translate(), matrix(), and matrix3d()
        // ─────────────────────────────

        function getAbsoluteTranslate(el) {
            var x = 0, y = 0;
            var current = el;
            while (current && current !== slideArea) {
                var t = current.style.transform || '';

                // Match translate(Xpx, Ypx)
                var tRegex = /translate\(([-\d.]+)px,\s*([-\d.]+)px\)/g;
                var m;
                while ((m = tRegex.exec(t)) !== null) {
                    x += parseFloat(m[1]);
                    y += parseFloat(m[2]);
                }

                // Match matrix(a, b, c, d, tx, ty)
                var mRegex = /matrix\(\s*([-\d.]+)\s*,\s*([-\d.]+)\s*,\s*([-\d.]+)\s*,\s*([-\d.]+)\s*,\s*([-\d.]+)\s*,\s*([-\d.]+)\s*\)/g;
                while ((m = mRegex.exec(t)) !== null) {
                    x += parseFloat(m[5]);
                    y += parseFloat(m[6]);
                }

                current = current.parentElement;
            }
            return { x: x, y: y };
        }

        var surfacePos = getAbsoluteTranslate(surfaceEl);
        var lensPos    = getAbsoluteTranslate(lensEl);

        // The reveal image offset: where the surface sits relative to the lens
        var initOffsetX = surfacePos.x - lensPos.x;
        var initOffsetY = surfacePos.y - lensPos.y;

        lensImg.style.left = initOffsetX + 'px';
        lensImg.style.top  = initOffsetY + 'px';

        // ─────────────────────────────
        // Drag — moves the entire group
        // ─────────────────────────────

        var dragging = false;
        var startPointerX, startPointerY;
        var dragX = 0, dragY = 0;
        var startDragX = 0, startDragY = 0;
        var origGroupTransform = groupEl.style.transform || '';

        groupEl.style.cursor = 'grab';

        function updatePosition() {
            // Shift reveal opposite to drag so it stays anchored to the surface
            lensImg.style.left = (initOffsetX - dragX) + 'px';
            lensImg.style.top  = (initOffsetY - dragY) + 'px';

            // Move the group
            groupEl.style.transform =
                origGroupTransform + ' translate(' + dragX + 'px, ' + dragY + 'px)';
        }

        groupEl.addEventListener('pointerdown', function (e) {
            dragging = true;
            groupEl.style.cursor = 'grabbing';
            startDragX = dragX;
            startDragY = dragY;
            startPointerX = e.clientX;
            startPointerY = e.clientY;
            groupEl.setPointerCapture(e.pointerId);
        });

        groupEl.addEventListener('pointermove', function (e) {
            if (!dragging) return;
            dragX = startDragX + (e.clientX - startPointerX);
            dragY = startDragY + (e.clientY - startPointerY);
            updatePosition();
        });

        groupEl.addEventListener('pointerup', function (e) {
            dragging = false;
            groupEl.style.cursor = 'grab';
            groupEl.releasePointerCapture(e.pointerId);
        });

        return true;
    }

    // ─────────────────────────────
    // Poll until all elements exist in the DOM
    // Retries every 100ms for up to 5 seconds
    // ─────────────────────────────

    var attempts = 0;
    var poll = setInterval(function () {
        attempts++;
        if (init() || attempts > 50) {
            clearInterval(poll);
        }
    }, 100);

})();
Adding a Scavenger Hunt Mode
The x-ray lens is already a compelling interaction on its own, but you can take it further by turning it into a discovery game. Imagine hiding objects within the reveal image that learners need to find by dragging the lens across the surface. When the lens passes over a hidden target, a Storyline variable flips to true, and you can trigger whatever response you want: a sound effect, a checkmark, a counter update, or a layer reveal.
How It Works
The script adds an optional FIND_OBJS array to the configuration block. Each entry maps a hidden object's data-model-id to a Storyline variable name. On every drag move, the script checks whether the lens bounding box overlaps each target's bounding box. The moment they overlap, it calls player.SetVar() to set that variable to true.
The overlap detection uses a fired flag to prevent rapid-firing. Once a variable is set, the flag blocks repeated calls while the lens stays over the target. The flag resets in two situations: when the lens moves away from the target, or when the Storyline variable is set back to False (for example, by a "Try Again" button trigger). This gives you clean, single-fire detection that still supports repeatable activities without reinitializing the JavaScript.
Setting Up the Variables
In Storyline, create a True/False variable for each findable object. Set the default value to False. Name them something descriptive like foundTumor1, foundCrack3, or foundClue_safe. These are the varName values you'll reference in the FIND_OBJS array.
Setting Up the Hidden Objects
Place your findable objects on the slide wherever you want learners to discover them. These can be small shapes, icons, or images. They don't need to be visible to the learner since they're hidden behind the surface image. Their position on the slide is what matters, because the script uses their bounding box for overlap detection.
Responding to Discoveries
Once a variable is set to true, use standard Storyline triggers to respond. For example:
Show a layer with a congratulations message when
foundItem1changes toTrueIncrement a numeric variable to track how many items have been found
Enable a "Continue" button only after all items are discovered
Play a sound effect on each discovery
Complete Code with Scavenger Hunt
This version includes everything: the base x-ray interaction, the find-objects feature, full keyboard accessibility, and touch/mobile support. The Pointer Events API handles mouse, touch, and pen input natively, so mobile works without any extra code.
For keyboard users, the group receives focus via Tab and moves with arrow keys (10px per press). A visible focus ring appears for keyboard navigation but stays hidden for mouse users. An aria-live region announces discoveries to screen readers.
(function () {

    // ─────────────────────────────
    // CONFIGURATION — Replace these with your own data-model-id values
    // ─────────────────────────────
    var SURFACE_OBJ = '5j7AGws53dU';  // The visible top image
    var REVEAL_OBJ  = '5WndEb2goOS';  // The hidden image (x-ray, blueprint, etc.)
    var LENS_OBJ    = '6kN6kx8IejA';  // The lens shape (any Storyline shape)
    var GROUP_OBJ   = '6oLfgDHlNoC';  // The group containing the lens

    // Objects to find — when the lens overlaps these, set the variable to true
    // Add as many as you need, or leave the array empty to disable this feature
    var FIND_OBJS = [
        { id: 'XXXXXXXXX', varName: 'foundItem1' },
        { id: 'XXXXXXXXX', varName: 'foundItem2' }
    ];

    var STEP = 10; // Pixels per arrow key press

    // ─────────────────────────────
    // Hide reveal ASAP — observer + style tag combo
    // Prevents flash of the reveal image before JS initializes
    // ─────────────────────────────

    var style = document.createElement('style');
    style.textContent = '[data-model-id="' + REVEAL_OBJ + '"] { visibility: hidden !important; }';
    document.head.appendChild(style);

    var revealHidden = false;
    var observer = new MutationObserver(function () {
        if (revealHidden) return;
        var el = document.querySelector('[data-model-id="' + REVEAL_OBJ + '"]');
        if (el) {
            el.style.visibility = 'hidden';
            revealHidden = true;
        }
    });
    observer.observe(document.body, { childList: true, subtree: true });

    // ─────────────────────────────
    // Main initialization
    // ─────────────────────────────

    function init() {
        var slideArea = document.querySelector('[data-dv_ref="contentArea"]');
        if (!slideArea) return false;

        var surfaceEl = slideArea.querySelector('[data-model-id="' + SURFACE_OBJ + '"]');
        var revealEl  = slideArea.querySelector('[data-model-id="' + REVEAL_OBJ + '"]');
        var lensEl    = slideArea.querySelector('[data-model-id="' + LENS_OBJ + '"]');
        var groupEl   = slideArea.querySelector('[data-model-id="' + GROUP_OBJ + '"]');

        if (!surfaceEl || !revealEl || !lensEl || !groupEl) return false;

        var revealImgTag = revealEl.querySelector('image');
        if (!revealImgTag) return false;

        // Stop observing once initialized
        observer.disconnect();

        // Get the reveal image source from the SVG <image> element
        var revealSrc =
            revealImgTag.getAttribute('href') ||
            revealImgTag.getAttribute('xlink:href');

        // ─────────────────────────────
        // Read the lens shape's SVG path for clipping
        // This makes ANY Storyline shape work as the lens
        // ─────────────────────────────

        var lensSvg  = lensEl.querySelector('svg');
        var lensPath = lensEl.querySelector('path');
        if (!lensSvg || !lensPath) return false;

        var pathData = lensPath.getAttribute('d');
        var vb       = lensSvg.getAttribute('viewBox').split(' ');
        var vbW      = parseFloat(vb[2]);
        var vbH      = parseFloat(vb[3]);

        // ─────────────────────────────
        // Build the overlay clipped to the lens shape
        // ─────────────────────────────

        var overlay = document.createElement('div');
        overlay.style.cssText =
            'position:absolute;top:0;left:0;' +
            'width:' + vbW + 'px;height:' + vbH + 'px;' +
            'overflow:hidden;pointer-events:none;' +
            'clip-path:path("' + pathData + '");';
        lensEl.appendChild(overlay);

        var lensImg = document.createElement('img');
        lensImg.src = revealSrc;
        lensImg.style.cssText = 'position:absolute;pointer-events:none;';
        overlay.appendChild(lensImg);

        // ─────────────────────────────
        // Size the reveal to match the surface
        // Uses offsetWidth/Height to avoid clipping issues
        // ─────────────────────────────

        var surfaceW = surfaceEl.offsetWidth;
        var surfaceH = surfaceEl.offsetHeight;

        lensImg.style.width  = surfaceW + 'px';
        lensImg.style.height = surfaceH + 'px';

        // ─────────────────────────────
        // Calculate position offset
        // Walks up DOM tree to sum ALL translation sources:
        // translate(), matrix(), and matrix3d()
        // ─────────────────────────────

        function getAbsoluteTranslate(el) {
            var x = 0, y = 0;
            var current = el;
            while (current && current !== slideArea) {
                var t = current.style.transform || '';

                // Match translate(Xpx, Ypx)
                var tRegex = /translate\(([-\d.]+)px,\s*([-\d.]+)px\)/g;
                var m;
                while ((m = tRegex.exec(t)) !== null) {
                    x += parseFloat(m[1]);
                    y += parseFloat(m[2]);
                }

                // Match matrix(a, b, c, d, tx, ty)
                var mRegex = /matrix\(\s*([-\d.]+)\s*,\s*([-\d.]+)\s*,\s*([-\d.]+)\s*,\s*([-\d.]+)\s*,\s*([-\d.]+)\s*,\s*([-\d.]+)\s*\)/g;
                while ((m = mRegex.exec(t)) !== null) {
                    x += parseFloat(m[5]);
                    y += parseFloat(m[6]);
                }

                current = current.parentElement;
            }
            return { x: x, y: y };
        }

        var surfacePos = getAbsoluteTranslate(surfaceEl);
        var lensPos    = getAbsoluteTranslate(lensEl);

        // The reveal image offset: where the surface sits relative to the lens
        var initOffsetX = surfacePos.x - lensPos.x;
        var initOffsetY = surfacePos.y - lensPos.y;

        lensImg.style.left = initOffsetX + 'px';
        lensImg.style.top  = initOffsetY + 'px';

        // ─────────────────────────────
        // Resolve find targets
        // Locates each findable object and pairs it with its variable
        // ─────────────────────────────

        var findTargets = [];
        var player = window.GetPlayer && window.GetPlayer();

        FIND_OBJS.forEach(function (obj) {
            var el = slideArea.querySelector('[data-model-id="' + obj.id + '"]');
            if (el) {
                findTargets.push({
                    el: el,
                    varName: obj.varName,
                    fired: false
                });
            }
        });

        // ─────────────────────────────
        // Overlap detection
        // Fires once per overlap, resets when the lens moves away
        // or when the Storyline variable is set back to false
        // ─────────────────────────────

        function rectsOverlap(a, b) {
            return !(a.right < b.left || a.left > b.right ||
                     a.bottom < b.top || a.top > b.bottom);
        }

        function checkFinds() {
            if (!player || findTargets.length === 0) return;

            var lensRect = lensEl.getBoundingClientRect();

            findTargets.forEach(function (target) {
                var currentVal = player.GetVar(target.varName);
                var targetRect = target.el.getBoundingClientRect();
                var overlapping = rectsOverlap(lensRect, targetRect);

                if (overlapping && !currentVal && !target.fired) {
                    // First overlap since variable was false — fire it
                    target.fired = true;
                    player.SetVar(target.varName, true);
                } else if (!overlapping) {
                    // Lens moved away — allow re-fire on next overlap
                    target.fired = false;
                } else if (!currentVal) {
                    // Variable was reset in Storyline — allow re-fire
                    target.fired = false;
                }
            });
        }

        // ─────────────────────────────
        // Shared drag state and update function
        // ─────────────────────────────

        var dragX = 0, dragY = 0;
        var origGroupTransform = groupEl.style.transform || '';

        function updatePosition() {
            lensImg.style.left = (initOffsetX - dragX) + 'px';
            lensImg.style.top  = (initOffsetY - dragY) + 'px';
            groupEl.style.transform =
                origGroupTransform + ' translate(' + dragX + 'px, ' + dragY + 'px)';
            checkFinds();
        }

        // ─────────────────────────────
        // Keyboard accessibility
        // Tab to focus, arrow keys to move, screen reader announcements
        // ─────────────────────────────

        groupEl.setAttribute('tabindex', '0');
        groupEl.setAttribute('role', 'application');
        groupEl.setAttribute('aria-label',
            'Draggable x-ray lens. Use arrow keys to move.');

        // Focus ring visible for keyboard users only
        var focusStyle = document.createElement('style');
        focusStyle.textContent =
            '[data-model-id="' + GROUP_OBJ + '"]:focus {' +
            'outline: 3px solid #4A90D9; outline-offset: 4px; }' +
            '[data-model-id="' + GROUP_OBJ + '"]:focus:not(:focus-visible) {' +
            'outline: none; }';
        document.head.appendChild(focusStyle);

        // Screen reader live region for discovery announcements
        var liveRegion = document.createElement('div');
        liveRegion.setAttribute('aria-live', 'polite');
        liveRegion.setAttribute('aria-atomic', 'true');
        liveRegion.style.cssText =
            'position:absolute;width:1px;height:1px;overflow:hidden;' +
            'clip:rect(0,0,0,0);white-space:nowrap;';
        document.body.appendChild(liveRegion);

        // Wrap checkFinds to announce discoveries
        var originalCheckFinds = checkFinds;
        checkFinds = function () {
            var beforeStates = findTargets.map(function (t) {
                return t.fired;
            });

            originalCheckFinds();

            findTargets.forEach(function (t, i) {
                if (t.fired && !beforeStates[i]) {
                    liveRegion.textContent = 'Discovered: ' + t.varName;
                }
            });
        };

        groupEl.addEventListener('keydown', function (e) {
            var moved = false;

            switch (e.key) {
                case 'ArrowLeft':
                    dragX -= STEP;
                    moved = true;
                    break;
                case 'ArrowRight':
                    dragX += STEP;
                    moved = true;
                    break;
                case 'ArrowUp':
                    dragY -= STEP;
                    moved = true;
                    break;
                case 'ArrowDown':
                    dragY += STEP;
                    moved = true;
                    break;
            }

            if (moved) {
                e.preventDefault();
                updatePosition();
            }
        });

        // ─────────────────────────────
        // Pointer drag (mouse, touch, pen)
        // ─────────────────────────────

        var dragging = false;
        var startPointerX, startPointerY;
        var startDragX = 0, startDragY = 0;

        groupEl.style.cursor = 'grab';

        groupEl.addEventListener('pointerdown', function (e) {
            dragging = true;
            groupEl.style.cursor = 'grabbing';
            startDragX = dragX;
            startDragY = dragY;
            startPointerX = e.clientX;
            startPointerY = e.clientY;
            groupEl.setPointerCapture(e.pointerId);
        });

        groupEl.addEventListener('pointermove', function (e) {
            if (!dragging) return;
            dragX = startDragX + (e.clientX - startPointerX);
            dragY = startDragY + (e.clientY - startPointerY);
            updatePosition();
        });

        groupEl.addEventListener('pointerup', function (e) {
            dragging = false;
            groupEl.style.cursor = 'grab';
            groupEl.releasePointerCapture(e.pointerId);
        });

        return true;
    }

    // ─────────────────────────────
    // Poll until all elements exist in the DOM
    // Retries every 100ms for up to 5 seconds
    // ─────────────────────────────

    var attempts = 0;
    var poll = setInterval(function () {
        attempts++;
        if (init() || attempts > 50) {
            clearInterval(poll);
        }
    }, 100);

})();
If you don't need the scavenger hunt feature, just leave the FIND_OBJS array empty and the script behaves exactly like the base version.
Customization Ideas
Once you have the basic x-ray lens working, there are several ways to extend it.
Constrain the Drag Area
Right now the lens can be dragged anywhere on the slide. To keep it within the surface image bounds, add boundary checks inside the pointermove handler that clamp dragX and dragY to the surface dimensions.
Add Multiple Reveal Layers
Want learners to toggle between different reveal images (x-ray, thermal, blueprint)? Use Storyline variables and multiple reveal objects. Add buttons that swap which reveal image the lens shows by changing the lensImg.src value.
Use It for Before/After Comparisons
This same technique works beautifully for before/after reveals. Use a "before" photo as the surface and an "after" photo as the reveal. Perfect for showing renovation progress, design iterations, or environmental change over time.
Troubleshooting Common Issues
The Reveal Image Is Offset or Misaligned
Make sure your surface and reveal images are the exact same dimensions and placed at the exact same position on the slide. Even a one-pixel difference will create a visible misalignment through the lens.
The Lens Doesn't Drag
Check that your Execute JavaScript trigger is firing. If you placed it at the start of the timeline, the DOM elements might not exist yet. Move the trigger to 0.25 seconds on the timeline, or the polling mechanism in the code will handle the delay automatically.
The Reveal Image Flashes Before Hiding
The code includes both a CSS style injection and a MutationObserver to hide the reveal image as early as possible. If you still see a flash, fade in the lens group starting at 0.25 seconds. This gives the script time to initialize before the lens becomes visible.
Grouped Objects Break the Alignment
The getAbsoluteTranslate function walks up the entire DOM tree, summing translation values from both translate() and matrix() transform formats. Storyline uses translate() for most objects but sometimes switches to matrix() for groups. The script handles both. Make sure your GROUP_OBJ ID matches the group that directly contains your lens. If you have nested groups, the script handles those automatically.
Wrapping Up
The x-ray lens effect is one of those interactions that looks complex but is surprisingly straightforward once you understand the mechanics. Four objects, one script, and a handful of CSS tricks create an experience that feels polished and interactive.
The key takeaways: Storyline positions everything with CSS transforms, so parsing those gives you pixel-perfect alignment. Reading the SVG path data from the lens shape means any Storyline shape works as the viewport without code changes. And moving the reveal image opposite to the drag direction keeps everything anchored.
Try it out in your next project. Whether it's medical imaging, product breakdowns, or hidden-detail exploration, learners love having a tool they can physically move to discover something new.
Want to see more JavaScript interactions for Storyline? Check out my other tutorials for more creative techniques, or grab one of my ready-made eLearning games to drop straight into your courses.
Nathan Stoker
I build custom eLearning in Storyline, Rise and JavaScript, and I make the free tools and templates on this site. Need an interaction like this in your course? Let's talk.