


Creating intricate 3D arrows for your eLearning content might seem complex, but I’ll guide you through an easy process to master this art. With just 4 straightforward steps, you’ll be on your way to crafting stunning 3D arrows for any creative application. Let’s dive in!
I created a similar blog almost a decade ago over at eLB Learning. It goes over the legacy 3D way, and if you aren’t able to use this tutorial I refer you back to their “6 Easy Steps to Make Amazing 3D Arrows in Illustrator” post.
Step 1: Design the Arrow Path and Choose the Color
Begin by drawing a straight line, then add a gentle curve with the curvature tool. This curve adds a personal touch to your arrow.
Step 2: Delve into Illustrator’s 3D Panel to Shape Your Arrows
After choosing your arrow’s path, go to Effect > 3D and Materials > Extrude and Bevel. This opens the powerful 3D and Materials Panel, where you’ll find three essential sections: Object, Materials, and Lighting.
Object Tab
Experiment with four unique 3D Types – Plane, Extrude, Revolve, and Inflate. We’ll focus on Extrude, but feel free to explore others for different effects.
- Bevel Settings: Fine-tune the Shape, Width, Height, and Repeat for the desired appearance.
- Rotation Section: Rotate your object using either the control panel or the on-screen guide for precise adjustments.
- Quick Actions: Consider expanding as a wireframe or exporting as a 3D object for use in other 3D software like Blender or Cinema 4D.
This step lets you delve into Illustrator’s innovative 3D functions, offering you unprecedented creativity.
Materials Tab
Experiment with Materials. For this tutorial, I’ve chosen Gold Natural with default settings.
Lighting Tab
Feel free to adjust the lighting, adding two sources if needed.
Step 3: Save Your Arrows as Graphic Styles
After creating several eye-catching variations, save them to the Graphics Style Panel. This allows you to build a library of diverse arrows for future use.
Step 4: Export Your Arrows with the Asset Export Panel
Gather your arrows, place them in the Asset Export Panel, and rename them for easy reference. Choose png as the format and set the width to 500 px. Select all, hit export, and voila! Your 3D arrows are ready to enrich your eLearning projects.
This tutorial simplifies the art of 3D arrow creation, enabling you to add depth and vibrancy to your designs. Happy designing!
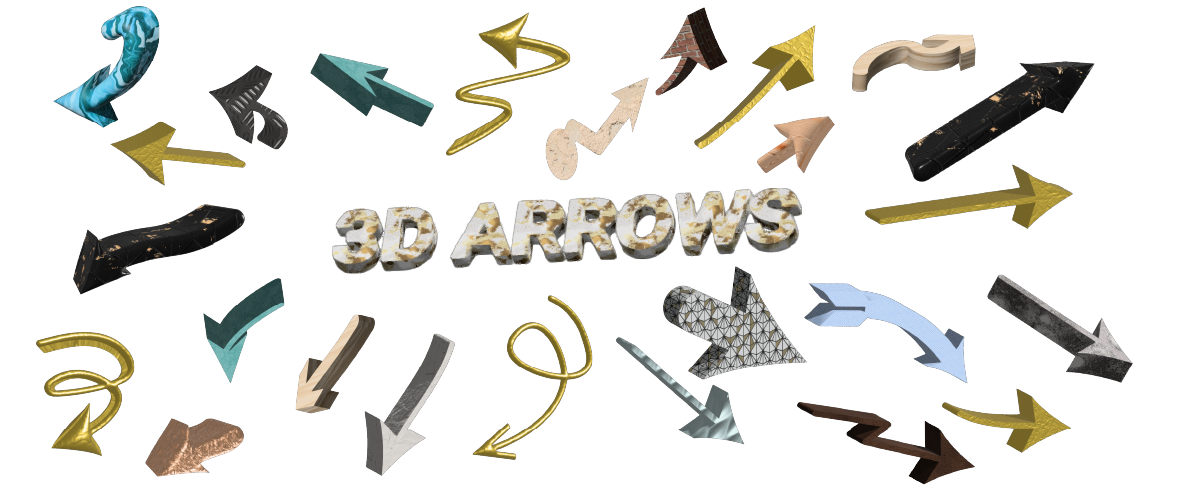
Check out the demo below. My header in this blog is a png with a transparency so you can download the file and cut out the arrows as needed for your courses.


