Build a Custom Animated Timeline with JavaScript and GSAP for Articulate Rise 360
Learn how to build a custom animated timeline with JavaScript and GSAP for Articulate Rise 360. This step-by-step tutorial includes scroll-triggered animations, completion tracking, accessibility features, and deployment instructions for Rise 360, Storyline, SharePoint, and standalone HTML.
By Nathan Stoker · Published Aug 23, 2026 · Updated Sep 30, 2026 · 12 min read
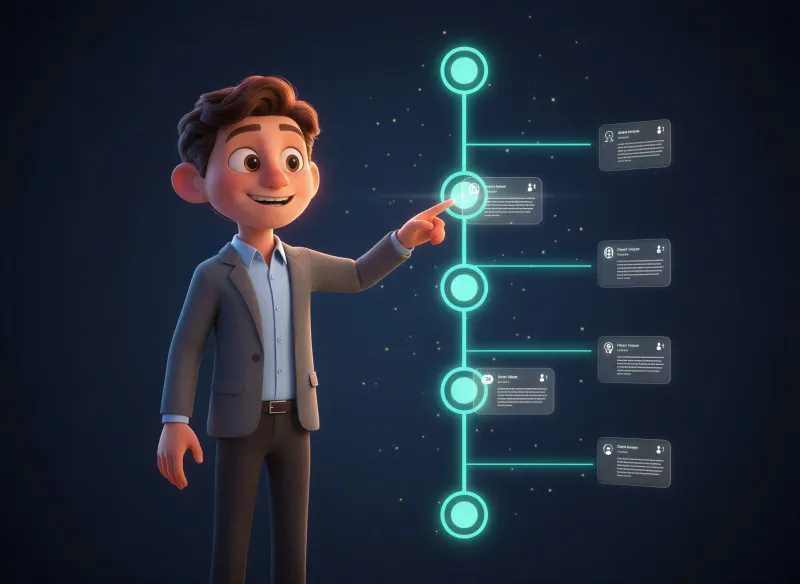
If you've ever wanted to present a sequence of events — onboarding steps, project milestones, a product roadmap — in a way that actually holds your learner's attention, you've probably been disappointed by what's available out of the box. Static text blocks and numbered lists get the job done, but they don't create the kind of engaging, scroll-driven experience that makes content memorable.
In this tutorial, you'll build a custom animated timeline with JavaScript and GSAP for Articulate Rise 360. Each milestone card slides into view as the learner scrolls, a glowing progress line tracks their position, and the entire interaction automatically reports completion back to Rise. The best part? You can customize every detail — content, colors, links, tags — by editing a single JavaScript array.
This same code works as a Storyline web object, a SharePoint embed, or a standalone HTML page. One build, four deployment options.
What You'll Build
The finished timeline includes several features that go well beyond what Rise offers natively.
Each milestone appears as a card containing a date label, a title, a description, category tags, and optional links to other resources. As the learner scrolls, GSAP's ScrollTrigger plugin detects when each card enters the viewport and animates it into view with a smooth slide-in effect. A vertical progress line fills from top to bottom, giving learners a clear visual indicator of how far they've traveled through the content.
When the final card animates in, the timeline fires a postMessage event that tells Rise 360 the Code Block interaction is complete. This means you can use a Continue block set to "Complete block directly above" and learners won't be able to advance until they've scrolled through the entire timeline.
The interaction is fully responsive, adapts to mobile screens, respects the prefers-reduced-motion accessibility setting, and uses ARIA roles and labels for screen reader support.
Prerequisites
You don't need to be a JavaScript developer to follow this tutorial. If you can copy and paste code and edit text between quotation marks, you'll be fine. That said, here's what you should have ready.
You'll need an Articulate Rise 360 course with at least one lesson where you want to add the timeline. You should have a basic understanding of how Rise Code Blocks work — if you haven't used one before, Articulate's official Code Block documentation is a good place to start.
The timeline uses GSAP (GreenSock Animation Platform) for scroll-triggered animations. GSAP is loaded from a CDN, so there's nothing to install. It's free for this type of use.
How the Custom Animated Timeline with JavaScript and GSAP Works
Before you paste any code, it helps to understand the three layers that make this timeline tick.
The Data Layer
All of your timeline content lives in a single JavaScript array called timelineData. Each object in the array represents one milestone card. Here's what a single entry looks like:
{
  date: "Day 1",
  title: "First Day Orientation",
  body: "Meet your onboarding buddy, get a tour of the facility...",
  tags: ["Orientation", "Culture", "Equipment"],
  links: [
    { label: "Virtual Facility Tour", url: "#facility-tour" },
    { label: "Our Mission & Values", url: "#mission-values" }
  ]
}
The date field appears as an uppercase label above the card title. The tags array renders as small pill-shaped badges at the bottom of each card. The links array is optional — if you don't need links on a particular card, just leave it out and the card renders cleanly without them.
This data-driven approach means you never have to dig through HTML to change your content. Add a milestone, remove one, or reorder them — just edit the array.
The Animation Layer
GSAP handles all of the motion. When the page loads, the script registers GSAP's ScrollTrigger plugin and creates an animation for each timeline card. As the learner scrolls, ScrollTrigger watches for each card to cross the 82% viewport threshold. When a card enters view, three things happen simultaneously: the card fades in and slides from the left, the node dot on the vertical line changes from gray to a glowing accent color, and the progress line extends downward to match the card's position.
The start: 'top 82%' value means animations trigger when the top of each card reaches 82% of the way down the viewport. This feels natural — the card begins animating just as the learner's eyes reach it. You can adjust this value if you want earlier or later triggering.
The Completion Layer
Rise 360 Code Blocks support a postMessage API for completion tracking. When the learner scrolls far enough to activate the final timeline card, the script sends a message to the parent Rise window:
window.parent.postMessage(
  JSON.stringify({ type: 'rise:block:complete' }),
  '*'
);
Rise picks up this message and marks the Code Block as complete. If you've placed a Continue block below the timeline set to "Complete block directly above," learners must scroll through the entire timeline before they can proceed. Outside of Rise (in Storyline, SharePoint, or standalone), this call simply fails silently with no errors.
Complete Code
Below is the full, unabbreviated code for the timeline interaction. Copy and paste the entire block — every line matters.
<!--
  CUSTOM TIMELINE BLOCK FOR ARTICULATE RISE 360
  ================================================
  Paste this entire code into a Rise 360 Code Block.

  Features:
  - GSAP-powered scroll-triggered animations
  - Accessible (keyboard nav, ARIA labels, reduced-motion support)
  - Responsive design
  - Rise completion tracking via postMessage
  - Customizable content (edit the timelineData array below)
-->

<style>
  @import url('https://fonts.googleapis.com/css2?family=DM+Sans:ital,opsz,wght@0,9..40,300;0,9..40,500;0,9..40,700;1,9..40,300&family=Fraunces:ital,opsz,wght@0,9..144,600;1,9..144,400&display=swap');

  * { margin: 0; padding: 0; box-sizing: border-box; }

  :root {
    --tl-bg: #0F1923;
    --tl-surface: #172A3A;
    --tl-line: #2A4A5E;
    --tl-accent: #00C9A7;
    --tl-accent-glow: rgba(0, 201, 167, 0.25);
    --tl-accent-dim: rgba(0, 201, 167, 0.08);
    --tl-text: #E8F0F2;
    --tl-text-muted: #8BA4B5;
    --tl-tag-bg: rgba(0, 201, 167, 0.12);
    --tl-tag-text: #00C9A7;
    --tl-radius: 12px;
    --tl-font-body: 'DM Sans', sans-serif;
    --tl-font-display: 'Fraunces', serif;
  }

  .tl-container {
    font-family: var(--tl-font-body);
    background: var(--tl-bg);
    color: var(--tl-text);
    padding: 48px 24px 64px;
    min-height: 100vh;
    overflow-x: hidden;
  }

  /* ---- HEADER ---- */
  .tl-header {
    text-align: center;
    max-width: 640px;
    margin: 0 auto 56px;
    opacity: 0;
  }

  .tl-header h2 {
    font-family: var(--tl-font-display);
    font-weight: 600;
    font-size: clamp(1.75rem, 4vw, 2.5rem);
    line-height: 1.2;
    margin-bottom: 12px;
    color: var(--tl-text);
  }

  .tl-header p {
    font-size: 1rem;
    color: var(--tl-text-muted);
    line-height: 1.6;
    font-weight: 300;
  }

  /* ---- TIMELINE STRUCTURE ---- */
  .tl-timeline {
    position: relative;
    max-width: 720px;
    margin: 0 auto;
    padding-left: 48px;
  }

  /* Vertical line */
  .tl-timeline::before {
    content: '';
    position: absolute;
    left: 15px;
    top: 0;
    width: 2px;
    height: 100%;
    background: var(--tl-line);
  }

  /* Animated progress line */
  .tl-progress-line {
    position: absolute;
    left: 15px;
    top: 0;
    width: 2px;
    height: 0%;
    background: linear-gradient(180deg, var(--tl-accent), var(--tl-accent) 85%, transparent);
    z-index: 1;
    transition: height 0.1s linear;
  }

  /* ---- TIMELINE ITEMS ---- */
  .tl-item {
    position: relative;
    margin-bottom: 40px;
    opacity: 0;
  }

  .tl-item:last-child {
    margin-bottom: 0;
  }

  /* Node dot */
  .tl-node {
    position: absolute;
    left: -48px;
    top: 6px;
    width: 32px;
    height: 32px;
    display: flex;
    align-items: center;
    justify-content: center;
    z-index: 2;
  }

  .tl-node-dot {
    width: 14px;
    height: 14px;
    border-radius: 50%;
    background: var(--tl-line);
    border: 3px solid var(--tl-bg);
    transition: all 0.4s cubic-bezier(0.34, 1.56, 0.64, 1);
    box-shadow: 0 0 0 0 var(--tl-accent-glow);
  }

  .tl-item.is-active .tl-node-dot {
    background: var(--tl-accent);
    box-shadow: 0 0 0 6px var(--tl-accent-glow);
    transform: scale(1.15);
  }

  /* Card */
  .tl-card {
    background: var(--tl-surface);
    border-radius: var(--tl-radius);
    padding: 24px 28px;
    border: 1px solid transparent;
    transition: border-color 0.4s ease, box-shadow 0.4s ease;
    cursor: default;
  }

  .tl-item.is-active .tl-card {
    border-color: rgba(0, 201, 167, 0.2);
    box-shadow: 0 8px 32px rgba(0, 0, 0, 0.25), 0 0 0 1px rgba(0, 201, 167, 0.08);
  }

  .tl-card-date {
    display: inline-block;
    font-size: 0.75rem;
    font-weight: 700;
    letter-spacing: 0.08em;
    text-transform: uppercase;
    color: var(--tl-accent);
    margin-bottom: 8px;
  }

  .tl-card-title {
    font-family: var(--tl-font-display);
    font-weight: 600;
    font-size: 1.25rem;
    line-height: 1.3;
    margin-bottom: 10px;
    color: var(--tl-text);
  }

  .tl-card-body {
    font-size: 0.925rem;
    line-height: 1.65;
    color: var(--tl-text-muted);
    font-weight: 300;
    margin-bottom: 14px;
  }

  .tl-card-body:last-child {
    margin-bottom: 0;
  }

  /* Tags */
  .tl-tags {
    display: flex;
    flex-wrap: wrap;
    gap: 6px;
    margin-bottom: 14px;
  }

  .tl-tags:last-child {
    margin-bottom: 0;
  }

  .tl-tag {
    display: inline-block;
    font-size: 0.7rem;
    font-weight: 500;
    letter-spacing: 0.03em;
    padding: 4px 10px;
    border-radius: 100px;
    background: var(--tl-tag-bg);
    color: var(--tl-tag-text);
  }

  /* Links */
  .tl-links {
    display: flex;
    flex-direction: column;
    gap: 6px;
  }

  .tl-link {
    display: inline-flex;
    align-items: center;
    gap: 6px;
    font-size: 0.85rem;
    font-weight: 500;
    color: var(--tl-accent);
    text-decoration: none;
    transition: color 0.2s ease, gap 0.2s ease;
    width: fit-content;
  }

  .tl-link:hover,
  .tl-link:focus-visible {
    color: #33DFBF;
    gap: 9px;
  }

  .tl-link:focus-visible {
    outline: 2px solid var(--tl-accent);
    outline-offset: 3px;
    border-radius: 3px;
  }

  .tl-link-icon {
    width: 14px;
    height: 14px;
    flex-shrink: 0;
    stroke: currentColor;
    fill: none;
    stroke-width: 2;
    stroke-linecap: round;
    stroke-linejoin: round;
  }

  /* ---- COMPLETION MARKER ---- */
  .tl-end-marker {
    text-align: center;
    margin-top: 48px;
    opacity: 0;
  }

  .tl-end-icon {
    width: 48px;
    height: 48px;
    border-radius: 50%;
    background: var(--tl-accent);
    display: inline-flex;
    align-items: center;
    justify-content: center;
    margin-bottom: 12px;
    box-shadow: 0 0 0 8px var(--tl-accent-glow);
  }

  .tl-end-icon svg {
    width: 22px;
    height: 22px;
    stroke: var(--tl-bg);
    fill: none;
    stroke-width: 2.5;
    stroke-linecap: round;
    stroke-linejoin: round;
  }

  .tl-end-text {
    font-size: 0.85rem;
    color: var(--tl-text-muted);
    font-weight: 300;
  }

  /* ---- REDUCED MOTION ---- */
  @media (prefers-reduced-motion: reduce) {
    .tl-header, .tl-item, .tl-end-marker {
      opacity: 1 !important;
      transform: none !important;
    }
    .tl-node-dot { transition: none; }
    .tl-card { transition: none; }
    .tl-progress-line { transition: none; }
  }

  /* ---- RESPONSIVE ---- */
  @media (max-width: 600px) {
    .tl-container { padding: 32px 16px 48px; }
    .tl-timeline { padding-left: 40px; }
    .tl-timeline::before, .tl-progress-line { left: 11px; }
    .tl-node { left: -40px; width: 24px; height: 24px; }
    .tl-node-dot { width: 12px; height: 12px; }
    .tl-card { padding: 18px 20px; }
    .tl-card-title { font-size: 1.1rem; }
  }
</style>

<div class="tl-container" role="region" aria-label="Interactive Timeline">

  <div class="tl-header">
    <h2>Your Onboarding Journey</h2>
    <p>From your first welcome email to your 90-day milestone, here's what to expect as you settle into your new role.</p>
  </div>

  <div class="tl-timeline" role="list" aria-label="Timeline events">
    <div class="tl-progress-line" aria-hidden="true"></div>
    <!-- Items injected by JS -->
  </div>

  <div class="tl-end-marker" aria-hidden="true">
    <div class="tl-end-icon">
      <svg viewBox="0 0 24 24"><polyline points="20 6 9 17 4 12"></polyline></svg>
    </div>
    <div class="tl-end-text">You've reached the end of the timeline</div>
  </div>

</div>

<script src="https://cdnjs.cloudflare.com/ajax/libs/gsap/3.12.5/gsap.min.js"></script>
<script src="https://cdnjs.cloudflare.com/ajax/libs/gsap/3.12.5/ScrollTrigger.min.js"></script>

<script>
/* ============================================================
   TIMELINE DATA — EDIT THIS ARRAY TO CUSTOMIZE YOUR CONTENT
   ============================================================ */
const timelineData = [
  {
    date: "Before Day 1",
    title: "Pre-boarding & Welcome",
    body: "You'll receive a welcome email with login credentials, a digital handbook, and a short intro video from your team lead. Complete your new hire paperwork and benefits enrollment through the employee portal before your first day.",
    tags: ["Welcome Kit", "Paperwork", "Benefits"],
    links: [
      { label: "Employee Portal Login", url: "#employee-portal" },
      { label: "Benefits Enrollment Guide", url: "#benefits-guide" }
    ]
  },
  {
    date: "Day 1",
    title: "First Day Orientation",
    body: "Meet your onboarding buddy, get a tour of the facility (or a virtual walkthrough for remote team members), pick up your equipment, and attend the New Hire Welcome Session where leadership shares the company mission and culture.",
    tags: ["Orientation", "Culture", "Equipment"],
    links: [
      { label: "Virtual Facility Tour", url: "#facility-tour" },
      { label: "Our Mission & Values", url: "#mission-values" }
    ]
  },
  {
    date: "Week 1",
    title: "Getting Connected",
    body: "Set up your workspace and tools, complete required compliance and security awareness training, and join intro meetings with key partners across your department. Your manager will walk you through team goals and your 30/60/90 day expectations.",
    tags: ["Compliance", "Security", "Team Intro"],
    links: [
      { label: "Security Awareness Training", url: "#security-training" },
      { label: "IT Setup Instructions", url: "#it-setup" },
      { label: "30/60/90 Day Template", url: "#306090-template" }
    ]
  },
  {
    date: "Week 2–3",
    title: "Role-Specific Training",
    body: "Dive into the skills and systems you'll use every day. Shadow experienced team members, complete hands-on exercises, and begin working on a starter project with guidance from your onboarding buddy.",
    tags: ["Job Skills", "Shadowing", "Hands-On"],
    links: [
      { label: "Role Training Modules", url: "#role-training" },
      { label: "Buddy Program FAQ", url: "#buddy-faq" }
    ]
  },
  {
    date: "Day 30",
    title: "30-Day Check-In",
    body: "Sit down with your manager for a one-on-one to reflect on your first month. Discuss what's going well, where you need support, and set clear goals for the next 30 days. You'll also complete a brief onboarding experience survey.",
    tags: ["Feedback", "Goal Setting", "Survey"],
    links: [
      { label: "Onboarding Survey", url: "#onboarding-survey" },
      { label: "Check-In Conversation Guide", url: "#checkin-guide" }
    ]
  },
  {
    date: "Day 60",
    title: "Building Momentum",
    body: "By now you're contributing independently and starting to own deliverables. Attend a cross-functional lunch-and-learn, explore professional development resources, and connect with an employee resource group that interests you.",
    tags: ["Development", "Networking", "ERGs"],
    links: [
      { label: "Professional Development Catalog", url: "#dev-catalog" },
      { label: "Employee Resource Groups", url: "#erg-directory" },
      { label: "Lunch & Learn Schedule", url: "#lunch-learn" }
    ]
  },
  {
    date: "Day 90",
    title: "Milestone Review & What's Next",
    body: "Complete your 90-day performance conversation with your manager. Celebrate your progress, finalize your development plan for the year ahead, and officially graduate from the onboarding program. Welcome to the team!",
    tags: ["Performance", "Celebration", "Growth Plan"],
    links: [
      { label: "Performance Review Form", url: "#performance-form" },
      { label: "Development Plan Builder", url: "#dev-plan" }
    ]
  }
];

/* ============================================================
   BUILD TIMELINE
   ============================================================ */
(function () {
  const container = document.querySelector('.tl-timeline');
  const progressLine = document.querySelector('.tl-progress-line');
  const prefersReducedMotion = window.matchMedia('(prefers-reduced-motion: reduce)').matches;

  // Render items from data array
  timelineData.forEach((item, i) => {
    const el = document.createElement('div');
    el.className = 'tl-item';
    el.setAttribute('role', 'listitem');
    el.setAttribute('aria-label', `${item.date}: ${item.title}`);

    el.innerHTML = `
      <div class="tl-node" aria-hidden="true">
        <div class="tl-node-dot"></div>
      </div>
      <div class="tl-card">
        <div class="tl-card-date">${item.date}</div>
        <div class="tl-card-title">${item.title}</div>
        <div class="tl-card-body">${item.body}</div>
        ${item.tags && item.tags.length ? `
          <div class="tl-tags">${item.tags.map(t => `<span class="tl-tag">${t}</span>`).join('')}</div>
        ` : ''}
        ${item.links && item.links.length ? `
          <div class="tl-links">${item.links.map(l => `
            <a class="tl-link" href="${l.url}" target="_top" rel="noopener">
              <svg class="tl-link-icon" viewBox="0 0 24 24"><path d="M18 13v6a2 2 0 0 1-2 2H5a2 2 0 0 1-2-2V8a2 2 0 0 1 2-2h6"/><polyline points="15 3 21 3 21 9"/><line x1="10" y1="14" x2="21" y2="3"/></svg>
              ${l.label}
            </a>
          `).join('')}</div>
        ` : ''}
      </div>
    `;
    container.appendChild(el);
  });

  // Skip animations if user prefers reduced motion
  if (prefersReducedMotion) {
    document.querySelectorAll('.tl-header, .tl-item, .tl-end-marker').forEach(el => {
      el.style.opacity = '1';
    });
    document.querySelectorAll('.tl-item').forEach(el => el.classList.add('is-active'));
    sendCompletion();
    return;
  }

  // Register GSAP ScrollTrigger plugin
  gsap.registerPlugin(ScrollTrigger);

  // Animate header on load
  gsap.fromTo('.tl-header',
    { opacity: 0, y: 30 },
    { opacity: 1, y: 0, duration: 0.8, ease: 'power2.out' }
  );

  // Animate each timeline item on scroll
  const items = document.querySelectorAll('.tl-item');
  let activatedCount = 0;

  items.forEach((item, i) => {
    gsap.fromTo(item,
      { opacity: 0, x: -30 },
      {
        opacity: 1,
        x: 0,
        duration: 0.6,
        ease: 'power2.out',
        scrollTrigger: {
          trigger: item,
          start: 'top 82%',
          toggleActions: 'play none none none',
          onEnter: () => {
            item.classList.add('is-active');
            activatedCount++;
            updateProgress(i);
            if (activatedCount === items.length) {
              animateEndMarker();
              sendCompletion();
            }
          }
        }
      }
    );
  });

  // Update the progress line height
  function updateProgress(index) {
    const percent = ((index + 1) / items.length) * 100;
    gsap.to(progressLine, {
      height: percent + '%',
      duration: 0.5,
      ease: 'power2.out'
    });
  }

  // Animate the end-of-timeline checkmark
  function animateEndMarker() {
    gsap.fromTo('.tl-end-marker',
      { opacity: 0, y: 20, scale: 0.9 },
      {
        opacity: 1, y: 0, scale: 1,
        duration: 0.7,
        ease: 'back.out(1.4)',
        delay: 0.3
      }
    );
  }

  // Tell Rise 360 the Code Block is complete
  function sendCompletion() {
    try {
      window.parent.postMessage(
        JSON.stringify({ type: 'rise:block:complete' }),
        '*'
      );
    } catch (e) {
      // Silently fail outside Rise
    }
  }

})();
</script>
Setting Up the Timeline in Rise 360
Getting this timeline into your Rise course takes about two minutes. Here's the step-by-step process.
Step 1: Add a Code Block
Open your Rise 360 course and navigate to the lesson where you want the timeline. Click the + icon between blocks to insert a new block. Select Code from the block categories, then choose Add code.
Step 2: Paste the Code
Select all of the code from the Complete Code section above and paste it into the Code Block editor. Rise will render the timeline immediately in the preview area. You should see the header text and the first card or two depending on the block height.
Step 3: Adjust Block Settings
Hover over the Code Block and click the Format option in the left toolbar. Set the Max Height to a value that works for your layout. A taller max height lets learners see more cards at once, while a shorter one creates more of a scrollable window effect. The timeline is designed to work well at any height.
Set the Content Width to Full for the most visually balanced layout. You can also adjust padding in the Format menu — reducing top and bottom padding helps the timeline feel more integrated with surrounding content.
Step 4: Enable Completion Tracking
If you want learners to scroll through the full timeline before advancing, toggle on the Completion setting in the Code Block options. Then add a Continue block directly below the timeline and set it to "Complete block directly above." The postMessage call in the code handles the rest.
Step 5: Customize Your Content
Edit the timelineData array in the JavaScript section to replace the sample onboarding content with your own. Each object in the array supports four properties: date (the label above the title), title, body, tags (an array of short category labels), and links (an array of objects with label and url properties). Tags and links are both optional.
Deploying as a Storyline Web Object
You can use this same timeline inside Articulate Storyline 360 as a web object. This approach is useful when you want the scroll-driven animation experience inside a Storyline project, or when you need to embed the timeline alongside other Storyline interactions.
Save the complete code as an index.html file. Create a folder for the project and place the index.html file inside it. You don't need any additional files since GSAP and the Google Fonts load from CDNs.
In Storyline, go to Insert > Web Object. Browse to your index.html file and insert it. Resize the web object frame to fill as much of the slide as possible. In the web object properties, make sure "Display in slide" is selected rather than "Display in new browser window" so the timeline renders inline.
One important note: Storyline web objects run inside an iframe, just like Rise Code Blocks. The postMessage completion call won't affect Storyline's built-in completion tracking, but the timeline itself will render and animate correctly.
Embedding in SharePoint
If your organization uses SharePoint for internal communications or learning portals, you can embed the timeline directly into a SharePoint page using the Embed web part.
Save the complete code as an index.html file and upload it to a SharePoint document library or any accessible web server. In your SharePoint page, add an Embed web part and paste the URL to your hosted index.html file. Alternatively, if your SharePoint environment allows it, you can paste the HTML directly into the Embed web part's code editor.
The postMessage completion call will be ignored in SharePoint since there's no Rise parent window listening for it. Everything else — the animations, responsive layout, and accessibility features — works exactly the same.
Running as a Standalone HTML Page
For the simplest deployment option, save the code as an index.html file and open it directly in any modern browser. This is a great way to preview and test changes before deploying to Rise or Storyline.
You can also host the file on any web server, CDN, or static hosting service like GitHub Pages or Netlify. Share the URL directly with stakeholders for review or embed it in any platform that supports iframes.
Customization Options
The timeline is built to be modified without touching the core logic. Here are the most common customizations.
Changing Colors
All colors are defined as CSS custom properties in the :root block at the top of the <style> section. To match your brand, update these values:
:root {
  --tl-bg: #0F1923;        /* Page background */
  --tl-surface: #172A3A;    /* Card background */
  --tl-accent: #00C9A7;     /* Accent color (dots, links, tags) */
  --tl-text: #E8F0F2;       /* Primary text */
  --tl-text-muted: #8BA4B5; /* Secondary text */
}
Change --tl-accent to your primary brand color and the glowing dots, progress line, links, and tags will all update automatically. If you want a light theme, swap --tl-bg and --tl-text and adjust --tl-surface to a light gray.
Changing Fonts
The timeline uses two Google Fonts: DM Sans for body text and Fraunces for titles. To change them, update the @import URL at the top of the style block and the corresponding CSS custom properties:
--tl-font-body: 'DM Sans', sans-serif;
--tl-font-display: 'Fraunces', serif;
Adding or Removing Links
Links are optional on every card. To add links, include a links array in the timeline data object. To remove them from a specific card, simply omit the links property entirely. The card layout adjusts automatically.
When deploying inside Rise 360, use target="_top" on your links (already included in the code) so that link clicks navigate the full Rise window rather than loading inside the Code Block iframe.
Adjusting Animation Timing
The start: 'top 82%' value in the ScrollTrigger configuration controls when each card begins animating. Lower percentages (like 70%) trigger animations earlier, while higher percentages (like 90%) wait until the card is almost fully in view. The card slide-in duration is set to 0.6 seconds with a power2.out easing curve — increase the duration for slower, more dramatic reveals.
Accessibility Features
Accessibility is built into the timeline at every level, not bolted on as an afterthought.
The outer container uses role="region" with an aria-label of "Interactive Timeline" so screen readers announce it as a distinct section. The timeline list uses role="list" and each card uses role="listitem" with an aria-label combining the date and title (for example, "Day 1: First Day Orientation").
Decorative elements like the node dots and progress line are marked with aria-hidden="true" so screen readers skip them entirely. All links include visible focus indicators with a 2px outline that meets WCAG 2.1 Level AA contrast requirements.
The prefers-reduced-motion media query detects when a learner has enabled reduced motion in their operating system settings. When active, all animations are disabled and every card renders immediately at full opacity. The completion event still fires so Rise tracking works correctly. This approach follows the W3C's guidance on motion and animation accessibility.
Troubleshooting
Here are solutions to the most common issues you might encounter.
Cards Don't Animate
If all cards appear at once without animation, check that the GSAP CDN links are loading correctly. Rise Code Blocks require external network access to load scripts from cdnjs.cloudflare.com. If your organization's network blocks CDN requests, the scripts won't load and the prefersReducedMotion fallback will display all cards statically.
Timeline Appears Blank
If the timeline container appears but no cards render, open your browser's developer console (F12) and check for JavaScript errors. The most common cause is a syntax error in the timelineData array — a missing comma, an unclosed quotation mark, or mismatched brackets.
Completion Not Tracking in Rise
Make sure the Completion toggle is enabled on the Code Block settings. Also verify that you're using a Continue block set to "Complete block directly above." The postMessage event fires only after the last card animates into view, so learners must scroll far enough to trigger it.
Links Don't Work in Rise
If link clicks aren't navigating away from the timeline, confirm that target="_top" is present on the anchor tags. Without it, Rise tries to load the link destination inside the Code Block iframe, which usually results in a blank frame or a cross-origin error.
Wrapping Up
This custom animated timeline with JavaScript and GSAP gives you a polished, scroll-driven interaction that works across Rise 360, Storyline, SharePoint, and standalone HTML. The data-driven architecture means your content lives in one easy-to-edit array, and the CSS custom properties make brand customization a matter of changing a few color values.
The combination of GSAP ScrollTrigger for animations, postMessage for Rise completion tracking, and built-in accessibility support means you get a production-ready component — not a proof of concept.
Grab the code, swap in your own milestones, and give your learners something worth scrolling through.
Nathan Stoker
I build custom eLearning in Storyline, Rise and JavaScript, and I make the free tools and templates on this site. Need an interaction like this in your course? Let's talk.